DevOps Velocity uses a containerized microservices architecture. Containerization means that plugins do not run directly from a host operating system but from containerized instances or pods managed by a containerization platform. Runtime instances or pods are created from images, which serve as a template.
These images are available from the HCL Harbor. DevOps Velocity retrieves images from this repository and creates instances as needed. DevOps Velocity is able to manage plugin installation and versioning without interrupting the user.
Using DevOps Velocity plugs-in when you don’t have access to the HCL Harbor
DevOps Velocity pulls the index.json file and displays the available plugin on the Integrations page. If your DevOps Velocity environment doesn’t allow access to index.json or HCL Harbor either because of Firewall restriction or lack of internet access, you can still use DevOps Velocity plugins with some additional setup. Access through a computer is necessary to access the plugins and import them into your environment.
The process to incorporate plugins is dependent on whether DevOps Velocity is running with a private Docker registry or not. First, you’ll want to determine the available plugins and available versions. See the HCL Accelerate plugins website to view the available plugins. The documentation for each plugin contains Version History and Documentation sections where you can view the available plugin versions and the plugin type value you’ll need to obtain the plugin image respectively.
For example:
Using the Redmine plugin as an example, the Version History page of the plugin documentation contains a link to the HCL Harbor repository for the plugin under the Image Link heading.
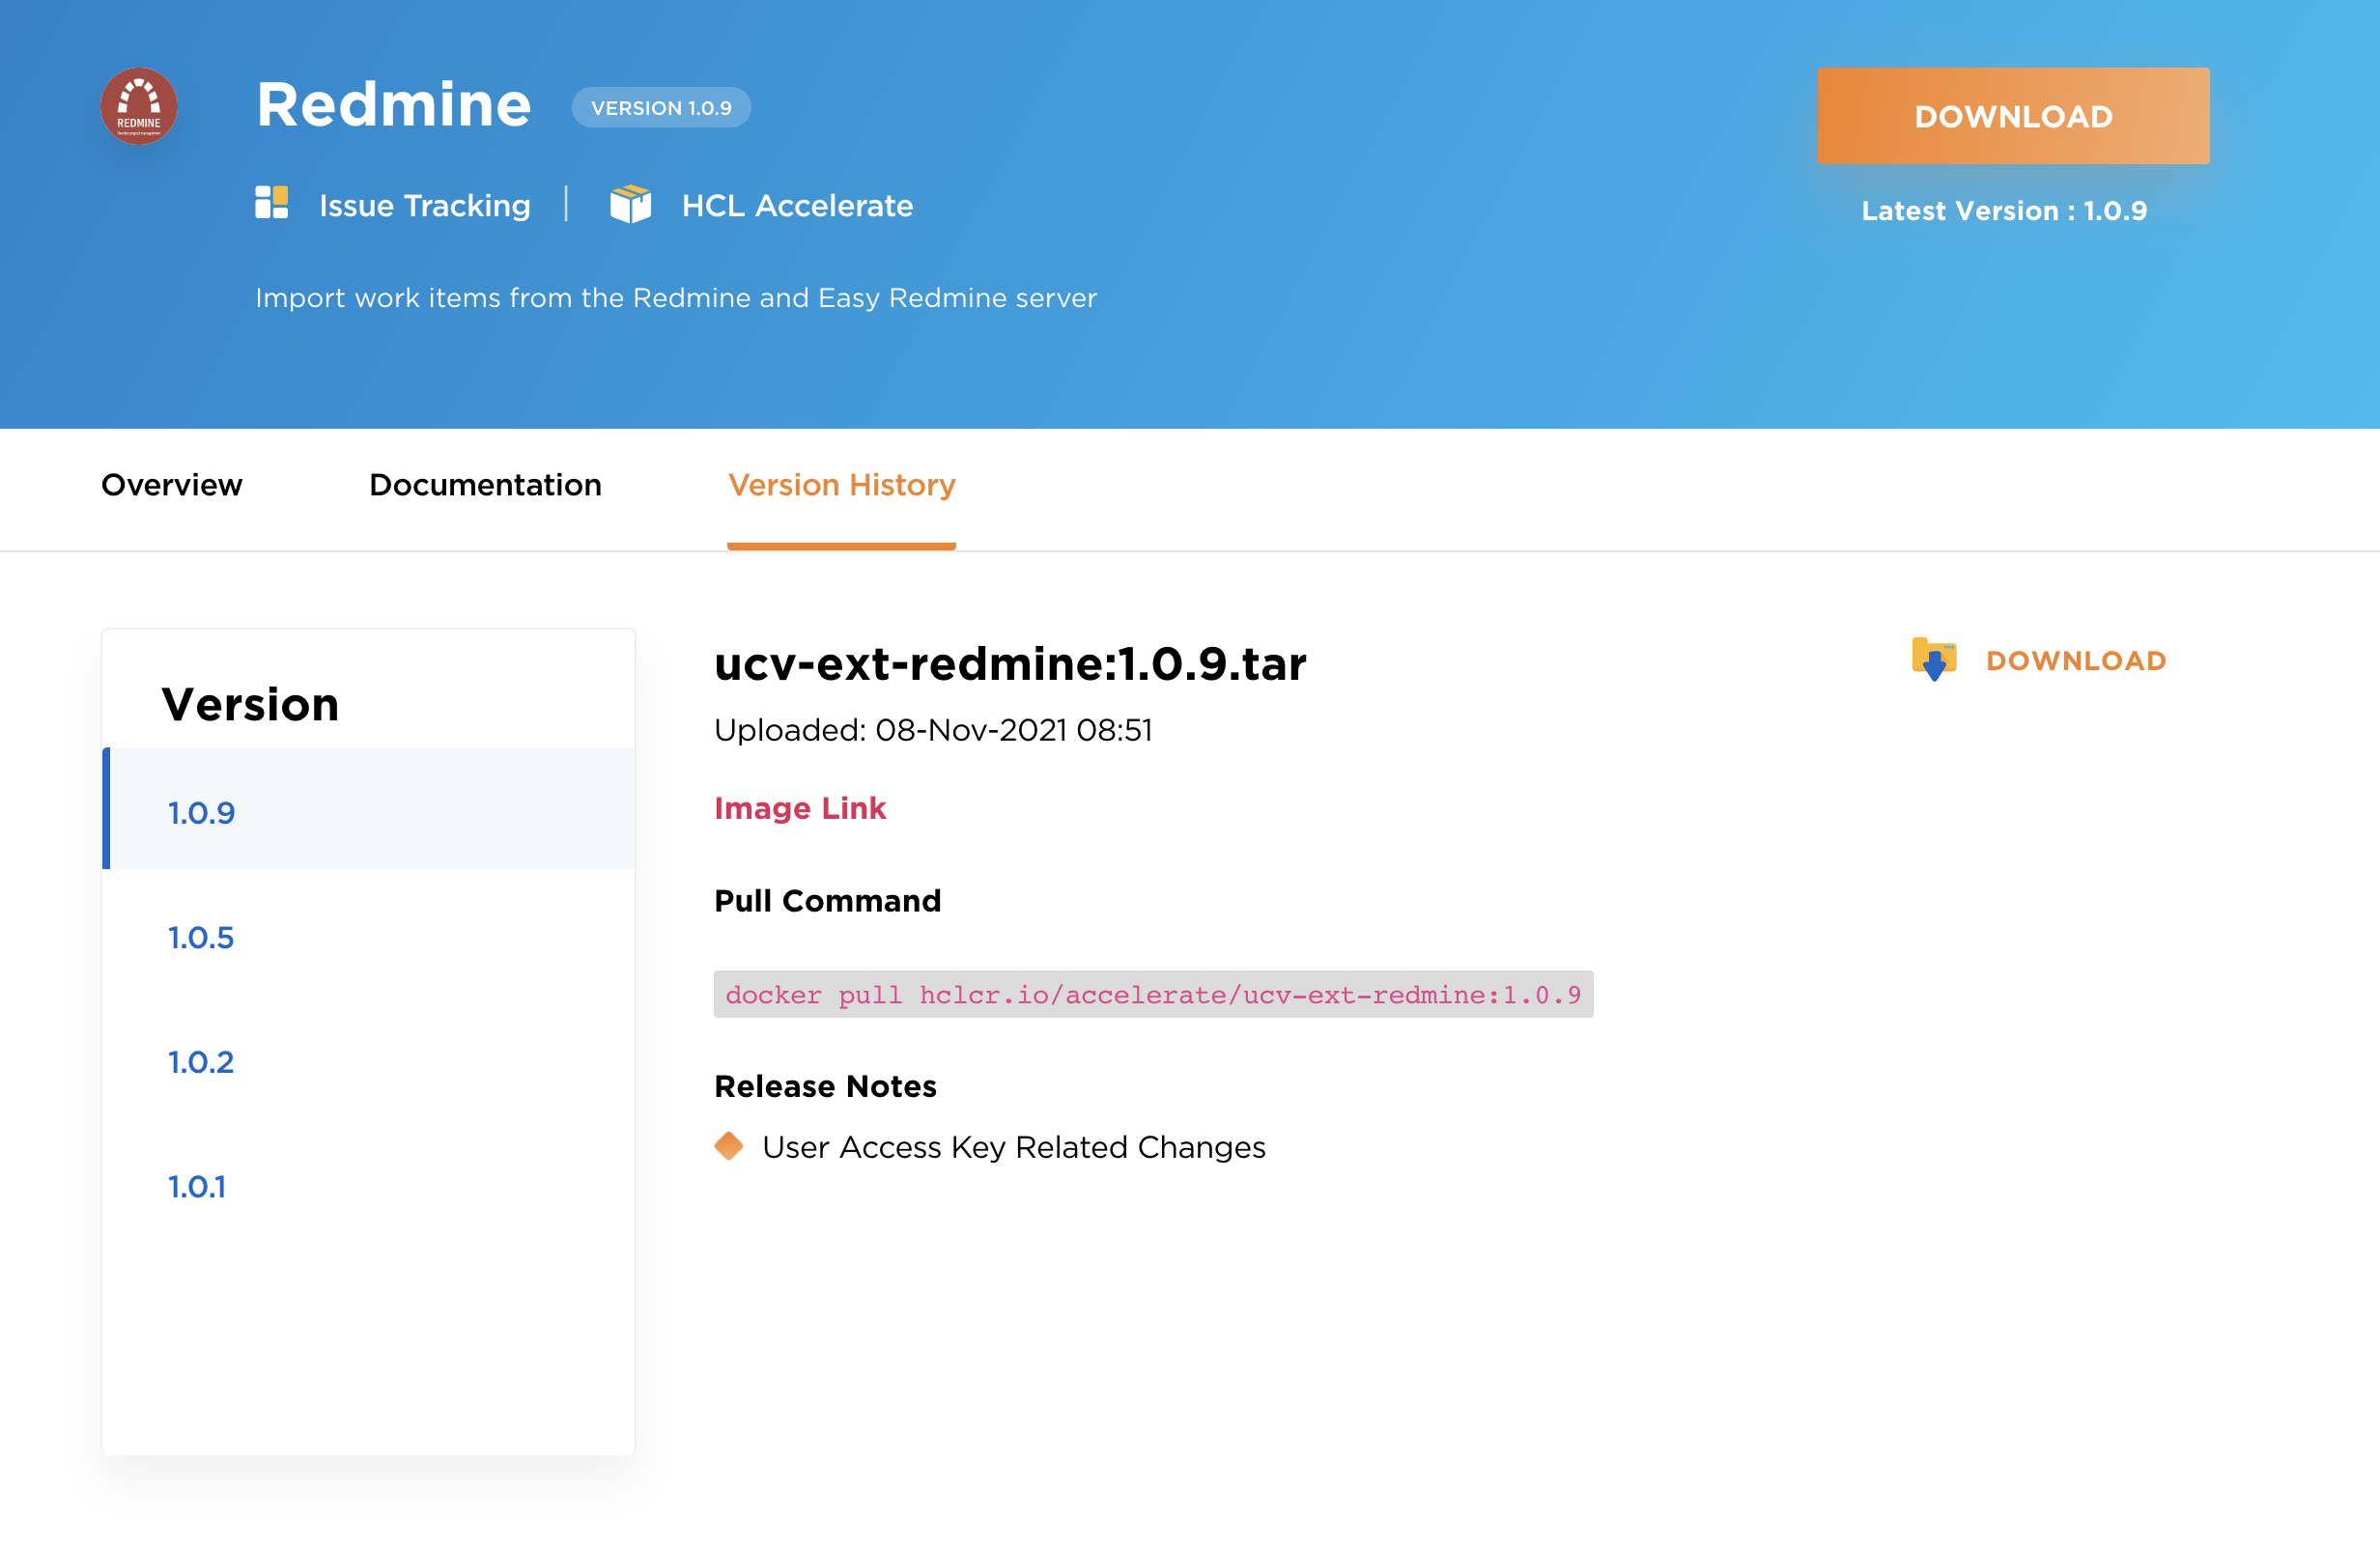
The links take you to the HCL Harbor repository page that displays the available version for the plugin and the command to pull the plugin image. The same information can also be seen in the Version History section as shown above. You can use Pull Command to pull a specific image version into your environment.
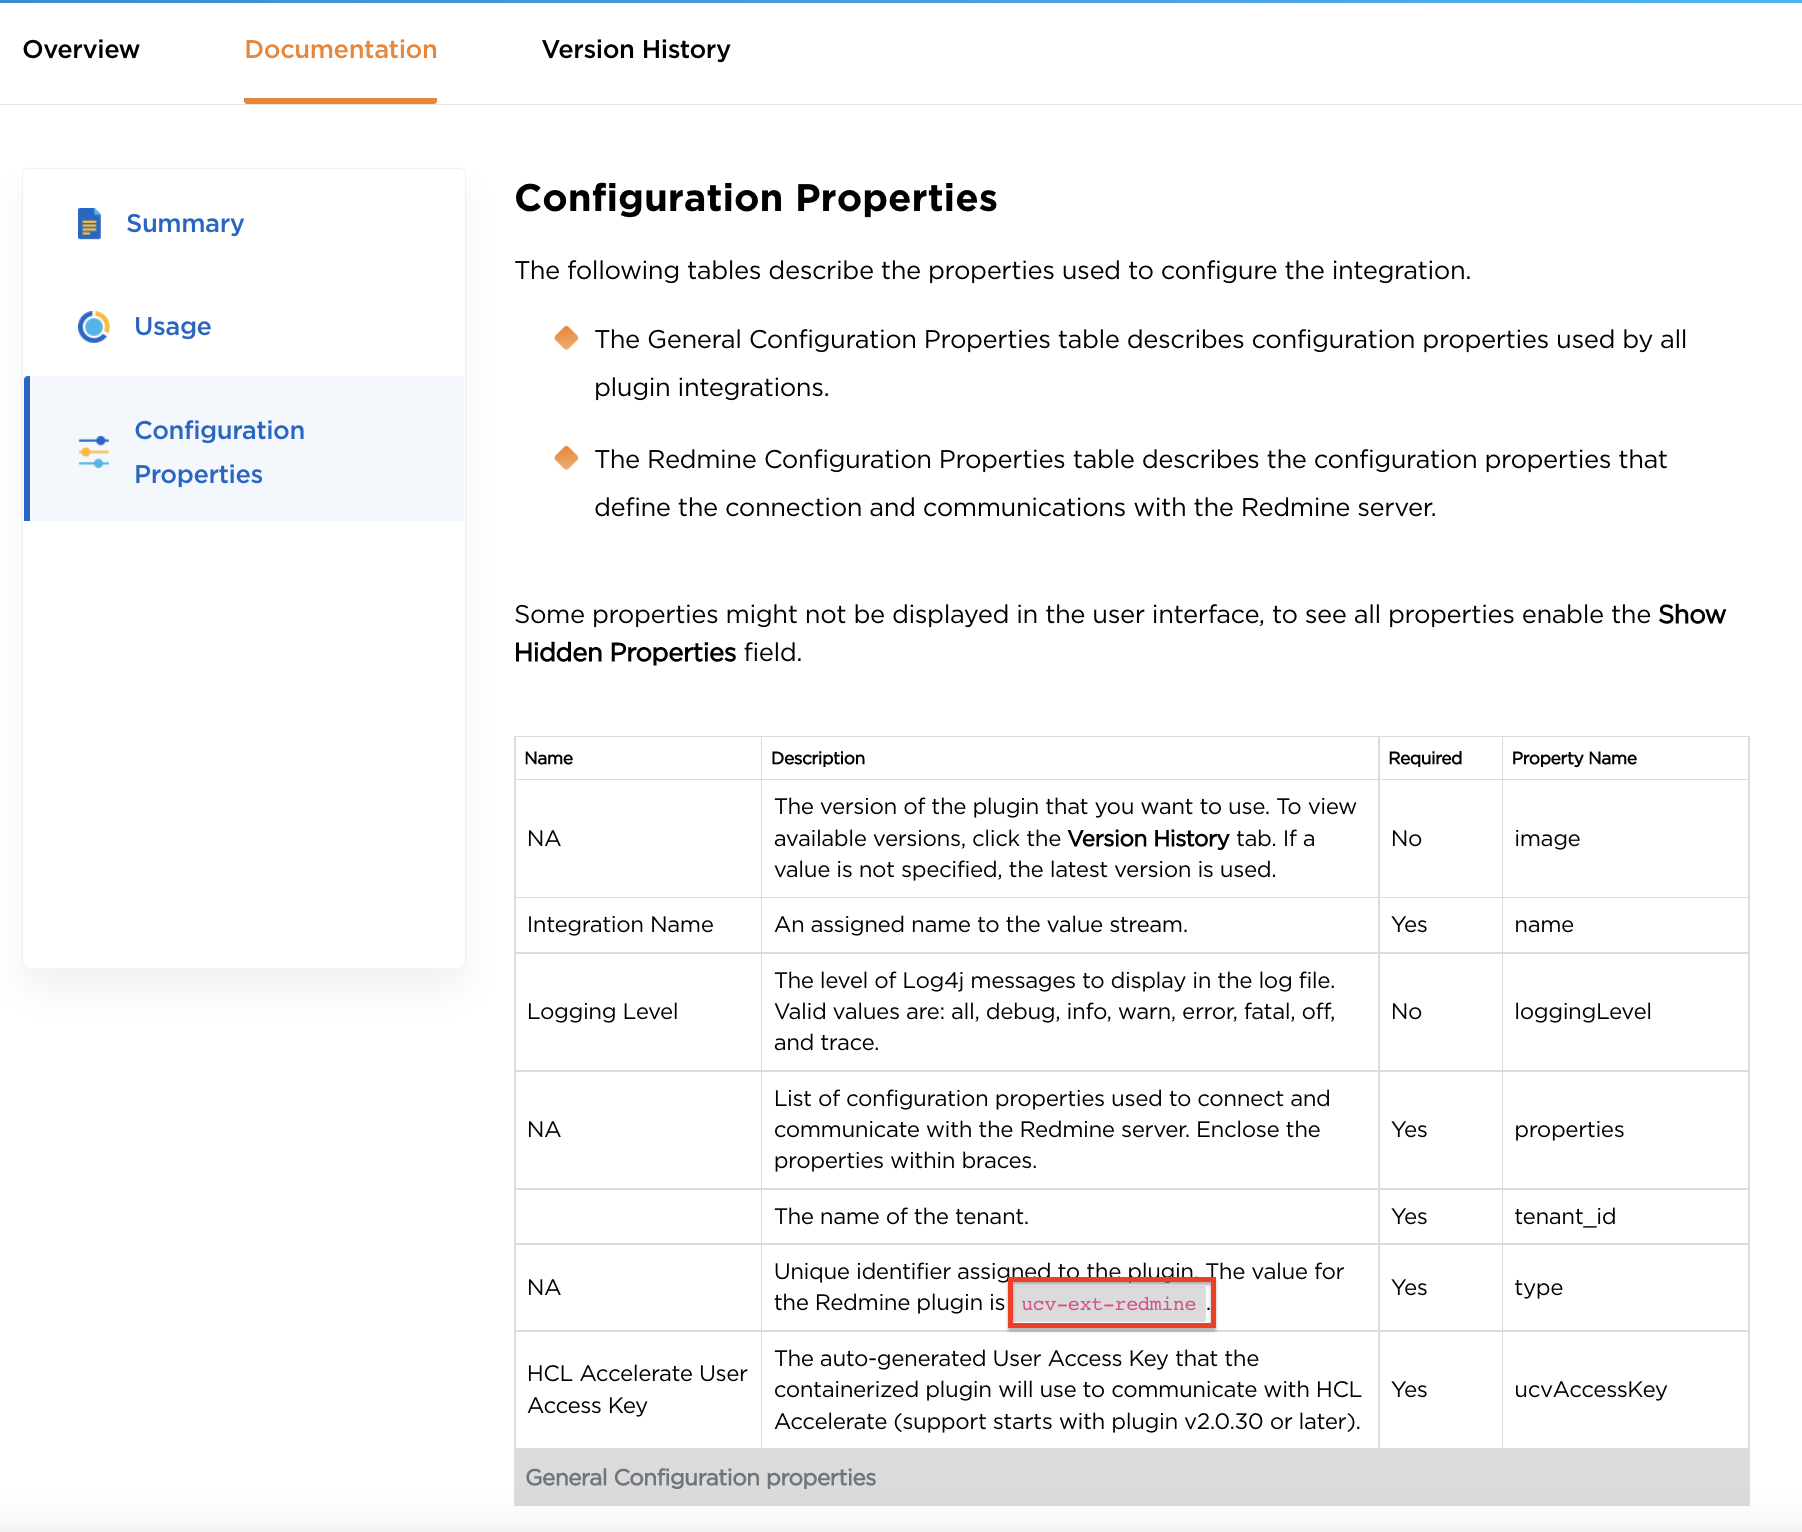
You can also find the plugin type value from the
General Configuration properties table on the Configuration Properties section of the plugin documentation as shown below.
Moving a plugin image into a private Docker Hub registry
To move the plugin Docker images to your private repository, complete the following steps using several Docker commands.
1. Pull the plugin Docker image to your local Dock registry by using the following command.
docker pull hclcr.io/accelerate/ucv-ext-<plugin_type>:<plugin_version>
Where <plugin_type> is the unique type assigned to each plugin and <plugin_version> is the version of the plugin to pull.
2. Tag the local Docker image to point to your private Docker registry. The parameter identifies the private registry, optionally including any path to group all DevOps Velocity related images together, for example, my-company-private-docker-registry.com/accelerate.
docker tag hclcr.io/accelerate/ucv-ext-<plugin_type>:<plugin_version> <private-repo>/ucv-ext-<plugin_type>:<plugin_version>
3. Push the image to the private registry.
docker push <private-repo>/ucv-ext-<plugin_type>:<plugin_version>
4. After the image is uploaded to the private registry, you can create a value stream JSON file to integrate the plugin. For the first integration, you must manually create the integration by downloading a value stream JSON file, making the necessary changes to define the integration, and uploading the JSON file to the DevOps Velocity server. See the plugin documentation for details on creating a value stream JSON file.
After an initial value stream has been created for a plugin, to create other integrations using the plugin, you can use the Create Integration button on the Integrations page of the user interface.
Upgrading DevOps Velocity plugins
Updates to DevOps Velocity plugins are placed on the HCL Harbor repository. Plug-in updates contain bug fixes, introduce new properties, and expanded functions. The DevOps Velocity plugins do not require an additional process to access the upgraded plugin code. However, you might want to know when a new version of a plugin is released and determine if it introduces or enhances a feature that you want to include in your integration. You can continue to use the plugin as-is or upgrade to the latest version. Your current integration continues to function as it currently does.
To upgrade an integration to the latest version of a plugin:
- From the Settings page, click Integrations.
- Click Check for upgrades. Integrations that are using plugin which has been upgraded contain a blue dot next to the integration name.
- Click the context menu (
 ) and select Upgrade.